Showing posts with label Oil Free. Show all posts

Vegan Apple Crumble Muffins - Recipe


Muffins are the perfect breakfast, snack or even dessert for just about anytime of the year! These muffins are full of fruity flavor, cinnamon-y spice, perfect sweetness and topped with a delicious crumble!

Healthy Homemade Bread

I love bread! I love all kinds of bread, but my favorite is the kind with a crunchy crust and soft insides! Whenever we make bread at home, it fills the house with a lovely smell, and I just can't wait for it to come out of the oven!
    Fall is here and we are already having some cooler weather, which has put me in the mood for some delicious homemade bread!


    This bread recipe is super simple, easy to make, and super healthy! I don't use any oil in making my bread, so its pretty much fat-free, and you can choose whether you add a sweetner or not to make it sugar-free!

     Another thing I love about making bread at home is that you can add whatever you want to it! I added herbs and oats to my bread today, but there are a million other things you can add! Here are a few of my favorites!

     Cinnamon and Maple Syrup

     Cinnamon and Raisins

     Pumpkin Seeds, Sunflower Seeds and Cracked Wheat

     Herbs and Sundried Tomatoes


Ingredients:

1 cup Warm Water

2 tbs Dry Active Yeast

3 tbs Sweetener (optional)(I used Organic Raw Sugar here, but I also love to use Maple Syrup, or you can use Agave, Honey, or any other form of sweetner you like! )

2 cups Flour (I like to use a 1/2 and 1/2 ratio of whole wheat and white flour, but you can do all one or the other as well!)

2 tsp Salt

Flavoring of Choice (Here I used 1/3 cup crushed oats and 2 tbs of herbs)

     Start by adding your water, yeast and sugar to you mixing bowl. I suggest using a electric mixer for this! Mix your yeast and sugar into the water for a few seconds and then let it rest for a minute or two.


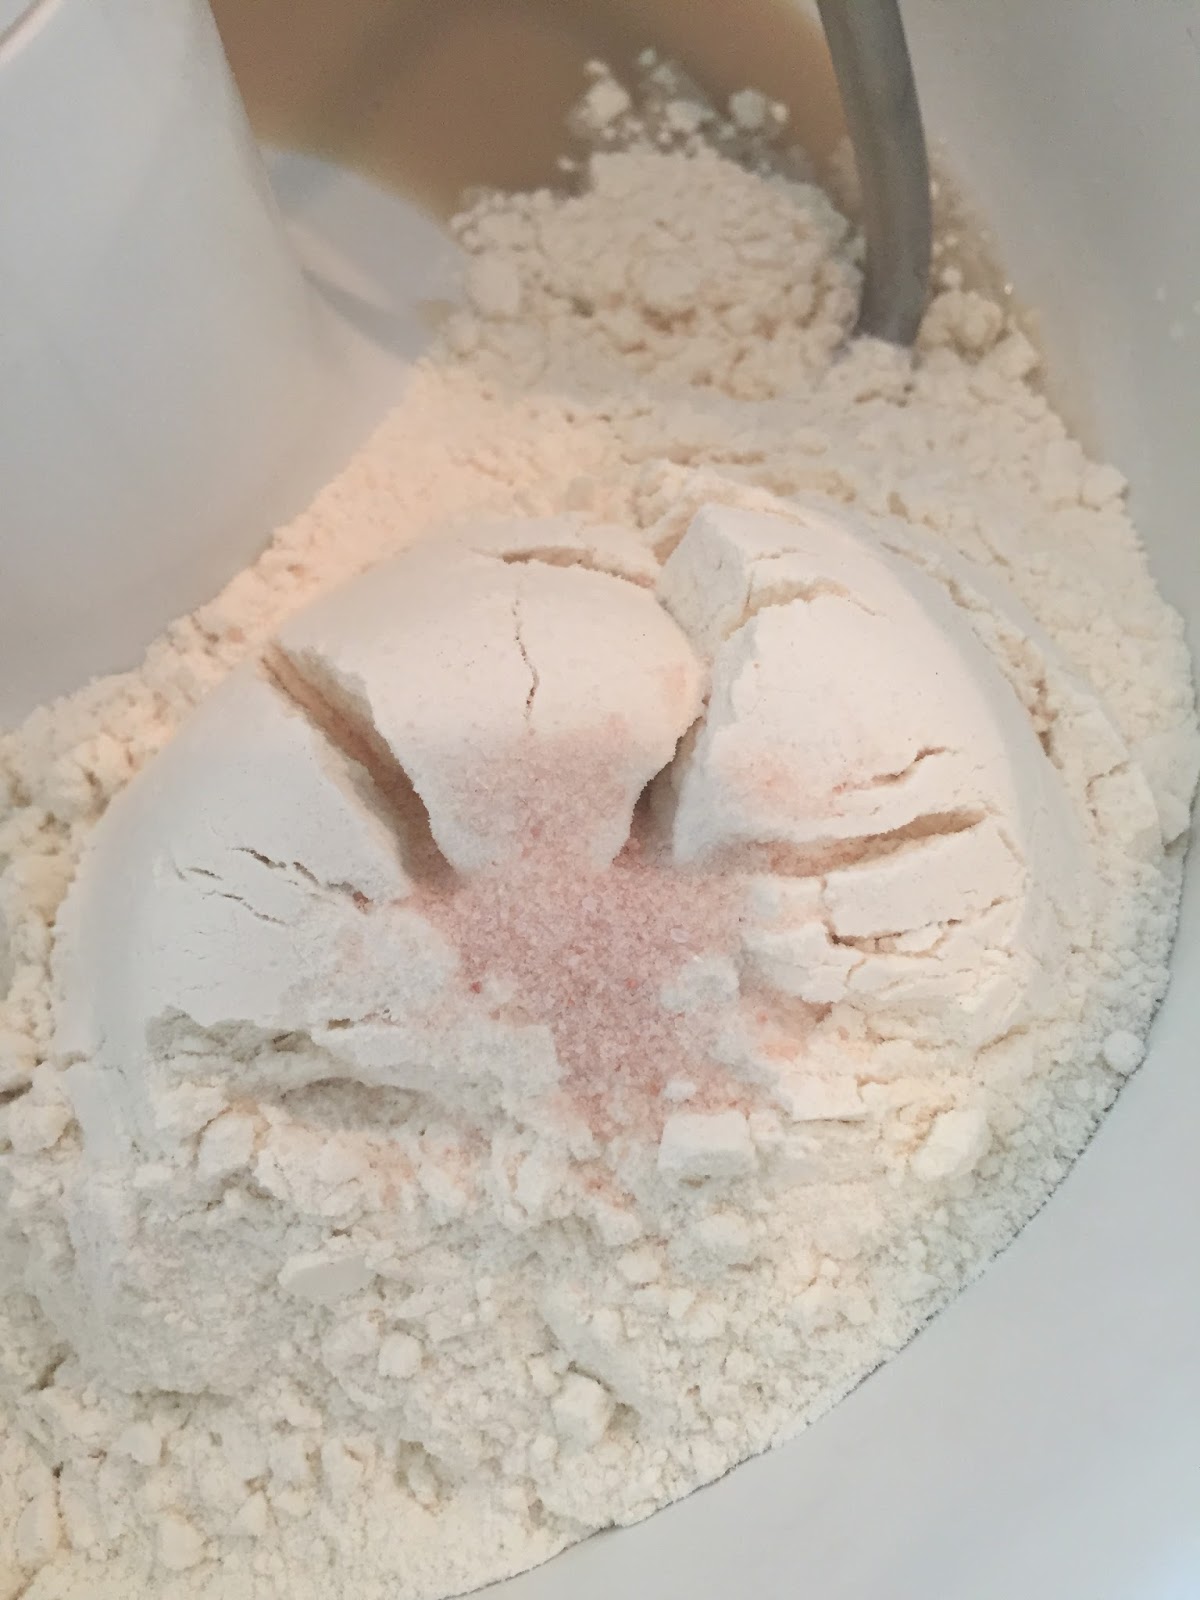
     Then, add in the flour, salt and flavorings. Make sure not to put the salt directly into the yeast mixture or it will kill the yeast. Once its mixed with the flour, its fine!

 
     Mix together until a dough ball has formed and the bowl of your mixer is fairly clean. You may need to add in extra flour.

 
     Knead the dough for 10 minutes in your mixer or 15 minutes by hand. Keep and eye on it, you might need more flour during the kneading process.

 
     After you have kneaded your dough, for it into a ball and allow it to rise for 30-35 minutes, or until it has doubled in size. It will rise better in a warm place, covered with a tea towel.


     Once it has risen, it's time to form your loaves. You can use bread pans, muffin tins, or do free-form as I did. I did two differnt loaves, one with herbs and oats and one with just oats. Make whatever shape you like, just remember they are going to rise again.


     Place themon a floured baking sheet or greased bread/muffin pan in your oven with the temps. set at the lowest setting. Mine goes down to 170 F. Let the bread rise for 25-30 minutes.


     If you want, you can take a sharp knife and gently make slices across the top, for a rustic look! Bake at 350 F for 24-30 minutes, or until the top goes golden brown and the bread comes off the pan easily.


     Allow them to cool for at least 15 minutes before slicing and enjoying! Your house should smell amazing and you should feel all warm and cozy!


     I sliced mine for supper and ate it along with some delicious vegetable soup! It was the perfect fall supper!


     How ever you choose to enjoy your bread, and what ever you like to put in your bread, I know that you will love this recipe just as much as I do! I love the simplicity of the recipe and the deliciousness of the bread! I just know that, once you make it, you won't go back to store bought ever again! :)


     If you enjoyed this recipe, please share it with your friends and family memebers!

You can follow this blog via email, Google or social media to keep up-to date on all the posts!

Instagram- That_Vegan_Runner

Tumblr- justrunningonfood

Pinterest- Hannah Plunkett

Twitter- SpinachisGood

I post every Friday!

Stay Healthy, Happy and Laughing!
H. Banana

Oil Free Fries

     Who doesn't love French fries? They're crispy, crunchy, salty, and (usually) fairy oily. How do we turn fatty, oily and unhealthy French fried into delicious, healthy homemade fries? It actually super simple and before you know it, you'll have some guilt-free French fries and you didn't even have to leave the house!

 
     I love just about anything made out of potatoes! Mashed, stewed, fried, baked, roasted..... the list goes on and on! I love turning these usually unhealthy dishes into healthier versions! These homemade fries are just as delicious and crispy as the ones in restaurants, but they are oil-free, vegan, and full of flavor!

Ingredients:
Potatoes ( Usually around 1 potato per person)
Salt and Pepper
Garlic Powder
Paprika
* Use what ever seasonings you like to customize your meal!

Start by washing and drying your potatoes. I only used one large one this time!


Cut them into sticks. The thickness depends on you. The thinner the sticks are, the faster they will cook and the crunchier they will be!


Add them to a bowl and sprinkle in your seasonings. I used around a tsp of each seasonings for my one large potato. Then, line a pan with parchment paper and lay out your potato sticks. Make sure they aren't touching.


Then, bake at 450 F for around 30-40 minutes, depending on the size of your sticks. Half way through, flip your potatoes over to get them crispy on all sides.


And now you have delicious, healthy French fries!


I love to eat these with ketchup, BBQ sauce, guacamole, or just on their own! They also pair well with veggie burgers, grilled veggies, and even inside tacos for a crunchy texture! However you eat these fries, I am sure you will agree with me, that these are some super yummy, oil free fries!


I hope you enjoyed this recipe! Please share it with your friends and family to help others live healthier lives!

You can follow the blog via email, Google, Twitter @ SpinachisGood, tumbler @ justrunningforfood, Pinterest @ Hannah Plunkett and on Instagram @ that_vegan_runner. Please connect with me over social media to get even more Spinach Is Good For You content!

I post every Friday!

Stay  Healthy, Happy and Laughing!

H. Banana

Healthy Candied Nuts for Father's Day!

   Father's Day is in just a few days! I can't believe it is already the middle of June already. It seems like just yesterday we were freezing in January!
     Anyways, with Father's Day approaching, everyone is thinking of ways to make their Dad feel special. There are a million ways to make him feel special and loved, but nothing says "I love You" like a homemade gift from the heart. And to make things even better, its a gift you can eat!


    I love candied nuts! They are so sweet, crunchy and really delicious on salads! But, most of the time, candied nuts are covered in butter, sugar syrups, egg whites, or additives that we really don't want in our body. So, what's a girl to do? Make healthy candied nuts, that's what!

     These candied almonds are vegan, oil and butter free, and really delicious! They make the perfect snack, salad or smoothie bowl topper, and Father's Day gifts! I can just see them in a glass jar with a tag tied to it as a gift for that special person in your life!

So, lets get started!

Ingredients:
1 1/2 cup Almonds ( Pecans or Walnuts would work here too, or a mix of all three!)
2-3 TBS Powdered Sugar
2 tsp Cinnamon
1 TBS Raw Granulated Sugar ( Optional)

Start by washing your almonds to make them wet. Place them in a bowl and try not to have too much water in the bowl. Add in the powdered sugar and cinnamon.

 
Stir them well until each nut is covered with the mix. The sugar will dissolve into a sticky 'sauce' , but that's okay!


Preheat your oven to 350 F. Line a baking sheet with parchment paper and spread the almonds out in one layer in the sheet. Make sure that not too many are on top of each other.

 
Bake for 20-25 minutes, stirring every 5-8 minutes. When you have 10 minutes left, sprinkle the raw sugar over the nuts and stir them well. This just adds a nice crunch, but its totally optional!
 
When the nuts are done, allow them to cool completely before removing from the pan. This will allow them to become nice and crunchy!
 
 
     Now you have a batch of healthy and delicious candied almonds! I ate them on their own as well as chopped up on a salad!  I would also love to give them as a gift! They would be perfect for Father's Day, House Warming Gift, Party Favor or any other occasion to treat some one with some delicious candied nuts!


I hope you enjoyed this post! I really enjoyed making these yummy treats and I hope you will like them as much as I do!

Please share this post and my blog with your friends and family to spread the love of a healthy lifestyle!

You can follow the blog via email, Google, Twitter @ SpinachisGood, Tumblr @ justrunningforfood, and on Pinterest @ Hannah Plunkett.

I post every Friday!

Stay Healthy, Happy and Laughing!

H. Banana

Happy Father's Day!

Go Bananas! Vegan Banana Bread

Who doesn't love a nice piece of banana bread? Its soft, moist, sweet and so comforting! Wouldn't you love it if banana bread could be good for you? So good for you that you don't feel guilty about eating the whole loaf in one day?... Well then, this is the recipe for you!


I love banana bread, I always have, but now that I am vegan, finding a good recipe hasn't been easy. I just decided to make a recipe that had everything I wanted. Low-Fat, Oil-Free, Vegan and (most importantly) super delicious! This is the resulting recipe!

 
Ingredients:
1 3/4 cups Flour
2 tsp Baking Powder
1 tsp Baking Soda
2 tsp Cinnamon
1 tsp Nutmeg
1/4 tsp Salt
2 Super Ripe Bananas
1/2 cup Maple Syrup
1/2 cup Almond Milk ( or Coconut would be really good too!)
1 tsp Vanilla
1/4 cup Raisins (Optional, but recommended)
 
Topping:
4TBS Flour
2 TBS Brown Sugar
Pinch of Cinnamon
2 TBS Almond Milk
2 TBS Oats
 
Okay, lets get rolling! Start by finding some super ripe bananas. They should look like this.
 
 
Peel them and add them to a bowl and give them a really good mash.
 
 
Then you can add the rest of the ingredients. Start with the wet ingredients and then add in the dry. Make sure not to over mix!


Feel free to tuck in with a spoon... no one will judge! :)

Line or grease a bread pan and pour in your batter.


Then, mix up your topping. You are going for a crumby mixture. Crumble your topping over the top.

 
Preheat the oven to 350 F and bake for 40-45 minutes. To test that it is done, stick a tooth pick in the center. If it comes out clean, its done.
 
 
Allow it to cool for 5 minutes before removing from the pan. Slice while warm to enjoy the fullness of this beautiful bread!


I couldn't believe how great this bread turned out! Its soft, moist, sweet and so healthy, all at once! What more could you ask for?
 
If you enjoyed this post, and this recipe, please share it with your friends and family! Recipes like these are rare, so you'll want to keep it!
 
You can follow the  blog via email, Google, Twitter @ SpinachisGood, Tumblr @ justrunningforfood, and on Pinterest @ Hannah Plunkett.
 
I post every Friday!
 
Stay Healthy, Happy and Laughing!
H. Banana

Smoky Roasted Chickpeas

    If you are anything like me, finding a good and healthy snack option isn't always easy! Maybe its pretty healthy, but its probably super expensive, or, its pretty cheap but not so healthy! What are we to do? Settle for expensive healthy snacks or cheap unhealthy ones?! No Way! There is a much easier and better solution than that!


     I have been seeing these roasted chickpeas all over the place lately. Lots of stores are selling them and a ton of people are posting recipes for them! The only problem is most of the time these chickpeas are covered in oil and ( if you get the store bought ones) preservatives! So, while they may be delicious, they aren't so healthy.
     So how do we solve this problem? We make our own of course! Not only is it cheaper to make your own snacks, its also so much healthier! You get to personalize it to your unique taste and you know exactly what went into it! Making these roasted chickpeas at home allows you to have a personalized and healthy snack, without losing taste or lots of money!


Ingredients:
1 can Chickpeas
1/2 tsp Salt
1/2 tsp Chili Powder
1/2 tsp Smoked Paprika
1/2 tsp Garlic Powder

or
1/2 tsp Cinnamon
1 tsp Maple Syrup or Brown Sugar

As you can see, this recipe really customizable. If you like savory snacks, go with the smoky flavor like I did. If you have more of a sweet tooth, go with the sweet option! I might also add, a little lime juice on the savory ones would be amazing!

First, open your chickpeas and rinse them really well. Then, pour them on a paper towel and dry them. Add them to a bowl along with your spices of choice.  Stir until each chickpeas is coated.

 
Preheat your oven to 450 F. Pour your coated chickpeas onto a baking sheet- large enough for them to be in one flat layer. Looking back, I would have put down some parchment paper to protect my pan, so you might want to do that as well!


Bake for 35-45 minutes, flipping every 10 minutes or so for even roasting. Once they are done, allow them to cool in the pan for at least 20 minutes.

 
Once they are cool, remove them from the pan and enjoy! What you don't eat right away can be stored in an air tight container!
 
 
Besides being a great snack, these roasted chickpeas are also great on salads, in wraps, in tacos, or even to replace the croutons on top of a soup! However you choose to eat these roasted beauties, I know you will enjoy them as much as I did!

 
Chickpeas are full of fiber and protein, so they are a great thing to add to you diet! Roasting them and adding flavor is just one way of making these cute little beans extra delicious!

If you enjoyed this post and the recipe, please share it with your friends and family! Everyone needs this healthy snack in their life!

You can follow the blog via email, Google, Twitter @ SpinachisGood, Tumblr @ justrunningforfood and on Pinterest @ Hannah Plunkett. I look forward to connecting with you guys!

I post every Friday!

Stay Healthy, Happy and Laughing!
H. Banana

Go Oil Free!

    Search for any recipe on Pinterest or any other website, and 9 times out of 10 it will have some sort of oil in it. Using oil in everyday cooking and baking may seen normal and necessary, but should it be? How necessary is oil for cooking and baking? Is it even as healthy as we've all heard it is?


    I came across oil-free eating around the same time I decided to adapt a vegan diet. At first, I wasn't sure how true it was, but the more I read into it and the more I learned, the more I realized that, living with out oil, has many health benefits!


Weightloss is one of the biggest benefits of going oil free. Oils are 100% fat and are very calorific! Simply removing or even limiting oils in your diet, you cut down your fat and overall calorie intake alot! This will aid in weightloss and fatloss!

Acne or other skin conditions may benefit greatly from removing oil from your diet. Most people who stop consuming oil and/or other fats see a huge change in their acne after only a week or so. If you struggle with acne or oily skin, try removing oil from your diet and see what it can do for you!

Arteries can take a big hit from our oil consumption as well! According to a study by Dr. Esselstyn, the monosaturated and saturated fats found in oils build up on the sides of our arteries and it can lead to cardiovascular problems. Thankfully, eliminating and even limiting our oil and fat intake can help to reverse the damage we may have caused!

Nutrient Void probaly isn't something you expect to hear along side things like olive oil or coconut oil. Afterall, they are supposed to be so healthy, right? But, a quick glance at the label of any oil container will show you that they aren't as nutrient-rich as well thought! This is because the oil that we know goes through such an intense filtering and refining process that, by the time it reaches the store shelves, not much of the nutrients that where there, are left!
    
Going Rancid is something that happens to oils as soon as they are pressed. The oil that can be found in the stores was probaly pressed months before it is bought and used, which means it is most likely rancid!

As you can see, eating an oil-free diet has so many benefits! Simply removing oil from your diet can help you lose weight, clear up you acne and oily skin, have healthy arteries, and save money! Speading money on empty, nutrient void calroies like oils can now be in the past!


     So if  we are going to live without oil, how do we cook and bake the foods we love? It is actually very easy! All you have to do is learn how to do it!

Stove Top Cooking- When you are cooking on top of the stove( Sauteing, Warming, etc...) you can simply not use oil. Veggies release a lot of water soon after you start cooking them, so you don't need to oil to keep them from sticking. You can also use a non-stick pan and/or add a bit of water or veg. broth to the pan to keep everything from sticking!

Baking- Replacing the oil in baked goods is also really easy! I love to use apple sauce and mashed bananas in my baked goods. You can also use mashed avocados, pureed beans and ground flax! To keep your recipe from sticking to your baking pans, line the pans with parchment paper and you are good to go!

Salad Dressing and Sauces- Salad dressings without oil are super easy to make! My favorite is balsamic vinegar, lemon juice and a bit of salt and pepper or just a squeeze of lemon! It might be strange at first, but you will soon come to love it as much as I do!
      Sauces are also easy to make! Blending cashews with some water, garlic and salt and pepper is a great base sauce that you can turn into anything! There are also so many recipes out there to choose from!

     If there is anything else that you use oil for, there is a way around it! Making the change and removing oil from your diet will be one of the best decisions you can make for your health! If you aren't so sure that oil-free can work or is necessary, try it for a week or two and see what you think then!

I hope you enjoyed this post! Please share it with you friends and family to help everyone live a healthier and happier life!

You can follow the blog via email, Google, Twitter @ SpinachisGood, Tumblr @ justrunningforfood, and on Pinterest @ Hannah Plunkett.

I post every Friday!

Stay Healthy, Happy and Laughing!
H. Banana

Asian Carrot Slaw

     With the weather warming up, I have been craving lots of fresh fruit and vegetables! In the winter months, we tend to fall into a habit of eating a lot of cooked meals, which is fine because the fresh produce you can find usually isn't so great! But, when the warmer months finally get here, its important and nice to start eating more fresh foods!


     I love carrots, raw or cooked, and they are a great source of Vitamin A, Vitamin C and Potassium! So, eating lots of carrots should be a no-brainer right? But eating just plain carrots all the time can get boring! Why not eat this delicious Asian Carrot Slaw to get in your carrots for the day? Its simple, flavorful, refreshing and super healthy! What more could you want?

    This recipe is Vegan, Low Fat, Oil Free, Refined Sugar Free, and Gluten Free! All the more reason to love this recipe! I know, once you try it, you'll be making it over and over again! Its perfect as a side dish, in tacos or burritos, on top of salads, in sandwiches, or in asian noodle salads! I can see it on the table at a picnic or outdoor party!


Ingredients:

3-4 Carrots, grated ( about 2 1/2 cups)
3-4 TBS Soy Sauce ( for Gluten Free, use a Gluten Free Soy Sauce)
2 TBS Seasame Seeds
1 tsp Salt
Pinch of Black Pepper
1/2 tsp Ground Ginger

Wash and peel your carrots. I used organic carrots, so I didn't feel the need to peel them! I grated my carrots by hand with a grater, but a food processor would make the process a bit faster!


Add them to a bowl along with the soy sauce, salt and pepper, ground ginger and seasame seeds. Mix well until everything is combined. Make sure the seasame seeds get mixed in well, they have a habit of clumping up on me!


And thats it! Can you believe how simple and easy that was? The hardest part was the carrots, but you do get in an arm workout! I suggest tasting the slaw to check the salt and pepper levels. Some might want it a bit spicier and some not so much!

 
You can eat it right away or store it in the fridge for a few days. The soy sauce might darken the carrots a bit, but don't let that worry you! Also, the salt might make the carrots juice a bit, so you might want to pour that off( if it happens) before serving!


The saltiness of the soy, the spice of the ginger and the nutiness of the seasame seeds all go so well together! Its like eating a flavor explosion! Its so refreshing and delicious, I know you will enjoy it! I really hope you try this recipe and experience it for yourself!

If you enjoyed this recipe, please share it with your friends and family! Also, you can share it on social media to reach even more people!

You can follow the blog via email, Google, Twitter @ SpinachisGood, Tumblr @ justrunningforfood, and on Pinterest @ Hannah Plunkett. I look forward to conntecting with you!

I post every Friday!

Stay Healthy, Happy and Laughing!
H. Banana