Showing posts with label healthy treat. Show all posts

Healthy Candied Nuts for Father's Day!

   Father's Day is in just a few days! I can't believe it is already the middle of June already. It seems like just yesterday we were freezing in January!
     Anyways, with Father's Day approaching, everyone is thinking of ways to make their Dad feel special. There are a million ways to make him feel special and loved, but nothing says "I love You" like a homemade gift from the heart. And to make things even better, its a gift you can eat!


    I love candied nuts! They are so sweet, crunchy and really delicious on salads! But, most of the time, candied nuts are covered in butter, sugar syrups, egg whites, or additives that we really don't want in our body. So, what's a girl to do? Make healthy candied nuts, that's what!

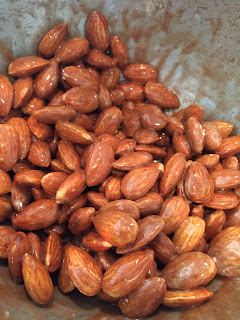
     These candied almonds are vegan, oil and butter free, and really delicious! They make the perfect snack, salad or smoothie bowl topper, and Father's Day gifts! I can just see them in a glass jar with a tag tied to it as a gift for that special person in your life!

So, lets get started!

Ingredients:
1 1/2 cup Almonds ( Pecans or Walnuts would work here too, or a mix of all three!)
2-3 TBS Powdered Sugar
2 tsp Cinnamon
1 TBS Raw Granulated Sugar ( Optional)

Start by washing your almonds to make them wet. Place them in a bowl and try not to have too much water in the bowl. Add in the powdered sugar and cinnamon.

 
Stir them well until each nut is covered with the mix. The sugar will dissolve into a sticky 'sauce' , but that's okay!


Preheat your oven to 350 F. Line a baking sheet with parchment paper and spread the almonds out in one layer in the sheet. Make sure that not too many are on top of each other.

 
Bake for 20-25 minutes, stirring every 5-8 minutes. When you have 10 minutes left, sprinkle the raw sugar over the nuts and stir them well. This just adds a nice crunch, but its totally optional!
 
When the nuts are done, allow them to cool completely before removing from the pan. This will allow them to become nice and crunchy!
 
 
     Now you have a batch of healthy and delicious candied almonds! I ate them on their own as well as chopped up on a salad!  I would also love to give them as a gift! They would be perfect for Father's Day, House Warming Gift, Party Favor or any other occasion to treat some one with some delicious candied nuts!


I hope you enjoyed this post! I really enjoyed making these yummy treats and I hope you will like them as much as I do!

Please share this post and my blog with your friends and family to spread the love of a healthy lifestyle!

You can follow the blog via email, Google, Twitter @ SpinachisGood, Tumblr @ justrunningforfood, and on Pinterest @ Hannah Plunkett.

I post every Friday!

Stay Healthy, Happy and Laughing!

H. Banana

Happy Father's Day!
Fudgy Mug Brownie


       Greetings! My name is Emma. I'm Hannah's younger sister. She has given me the privlege of guest writing a blog post! I'm super excited to write this! This week's post is on a gooey, fudgy mug brownie to die for!


I developed the recipe for this vegan and gluten free brownie one afternoon when I had a craving for something sweet. I went into our pantry, grabbed some ingredients, and started putting a little bit of this and that into a mug. The finish product was amazing!

 
Heavenly!!!
 
 
Fudgy goodness!
 
Okay, enough chattering, you need to know how you can make this and put it in your belly!


Fudgy Mug Brownie
(Note: This recipe is vegan and gluten free, so everyone can enjoy!)
 
Step one: add the following ingredients listed to a mediem sized coffee mug.
 
1 &1/2 TBS of cocoa powder
1 tiny pinch of salt
1/4 TSP of baking powder
2 TBS of almond flour
1 TBS of sugar
mix
Step two:  Add wet ingredients to dry.
 
1 heaping TSP of creamy peanut butter
1-2 splashes of vanilla unsweetened almond milk
1 tiny splash of vanilla extract
 
Mix until well combined.
 
Step three: Mirowave for 30 seconds, or until done. ( Note: Cook time may vary, depending on the strengh of your mirowave, also note that it is very easy to over bake this brownie, so be careful!)
 
Step four: Let the brownie cool slightly, and devour!
( opptionaly: add a tiny spoonful of peanut butter to top it off.)


There you go folks, your fudgy mug brownie! I hope you enjoy this brownie as much as I did, and I'm pretty confident  you'll love it too! Be sure to leave a comment below if you tried this recipe or not, and share it with your friends!
 
 
If you enjoyed this post, please share it and this blog with your friends and family so that everyone can enjoy recipes like this one!
 
You can follow the blog via email, Google, Twitter @ SpinachisGood, Tumblr @ justrunningforfood, and on Pinterest @ Hannah Plunkett.
 
New Post every Friday!
 
Enjoy this delicious recipe and I'll see you later!- Emma
 
Stay Healthy , Happy and Laughing
 
H. Banana
 

'Eat Your Heart Out' Valentine's Day Brownies

Valentine's Day is just a few days away, and whether or not you have a special someone this year, you'll want this brownie recipe! Its very delicious, moist, chocolatey, and even fruity! Perfect for impressing someone, showing your love, or drowing your feelings in this Valentine's Day!


These brownies are the perfect balance of sweet, rich, and fruity! The addition of the raspberry makes these chocolate delights something special,  not to mention festive! They are oil, dairy, and practically fat free, as well as being refined-sugar free and vegan. But, just because they are void of a few standard-brownie ingredients, doesn't mean they are any less delicious! And, because they are so healthy, you can feel free to Eat Your Heart Out of them! :)


Ingredients:
1 1/2 ripe Bananas
1 tsp Vanilla
1/2 tsp Salt
4 TBS Maple Syrup
3/4 cup Cocoa Powder
1 1/3 cup Flour
1 TBS Baking Soda
1 cup Water ( You could also use coffee or non-dairy milk)
2 TBS White Vinegar
Jam of Choice (I used Raspberry, but Blackberry or Strawberry would be yummy too!)

First, we need to deal with the bananas. I used frozen ones, and just let them come to room-temp. before using them. Make sure they are really ripe! They riper they are, the sweeter they'll be!

Using a hand mixer, puree your bananas until smooth.


Then add in the Vanilla and Maple Syrup. Mix well together and add in the dry ingredients.


Use a spoon to fold in the dry ingredients. The cocoa powder, flour, salt and baking soda. Mix until about half way combined. It will be dry.

 
Then mix the vinegar with the water( or liquid of choice) and add it to the batter. This will cause the batter to puff up a bit, but don't worry! Thats the point!

Mix well and then pour into the pan. I used parchment paper to line my pan, but feel free to use oil or baking spray to keep the brownies from sticking!


Make sure the batter is even, and then get out your jam. Again, I went with raspberry, but go with what every jam-flavor sounds good to you! You could even do a nut butter or nut-chocolate spread and get a whole different flavor!

Use a spoon to add dots of jam to the top of the brownie batter. You can use a knife to swirl in some of the jam too!


And now, these brownies are ready for the oven! Bake at 350 F for 40-45 minutes. They will smell amazing when done! :)


If you are spending Valentine's Day alone this year, you might just want to dig into the pan now. No judgement here! :)
But, if you are going to be sharing these treats, allow them to cool before cutting.

 
To serve, warm them a bit and top with your favorite toppings! I went with Almond Dream non-dairy ice cream, and my family added chocolate sauce as well! Some warm jam would also be amazing!
 
 
They were delicious! The perfect treat for any sweet tooth, and especially perfect for Valentine's Day! Whether you make these for your family, special someone, or eat the whole pan yourself, you can feel good about eating these browines! Even though they are healthier, doesn't mean they don't make for the perfect Valentine's Day( or any time really) treat!


If you enjoyed this post, please share it with your friends and family! Make sure that everyone you love has a great brownie recipe this year!

You can follow the blog via email, Google, Twitter @ SpinachisGood, Tumblr @ justrunningforfood, and Pinterest @ Hannah Plunkett.

I post every Friday!

Happy Valentine's Day!
H. Banana

Layered Fruit Pops!

   Summer is approaching very fast! The days are getting longer and the weather is getting warmer!  And what better way to cool off than with a delicious popsicle!?! This recipe is super easy to make, healthy, and you only need 2 ingredients!!

 
Don't they look delicious? I love the contrast of the colors!
 
Ingredients:
2 Cups Mango Chunks
1-1/2 Cup Berries
 
and that's it! Can you believe how simple this recipe is?
 
First, if you are using frozen fruit(I did) you need to let them thaw a bit.
 
 
Mangoes are my favorite fruit!
 
 
Place the mangoes in a blender or food processor. Blend until creamy and smooth!

Then, get your popsicle molds ready! I got this super cute one at TJMAXX the other day!


Fill the molds half way up.

 
Now we need to show some love to the berries!
Place the berries in the blender.
 
Blend to a puree
 
Now fill the molds to the top with the berry puree.
 
Place the lids and sticks in the molds. Put them in the freezer for at least 4 hours, but over night is better. Once frozen, take them out of the freezer.
 
Run under warm water to lose the mold from the pop.

Now they are ready to eat! Enjoy them on those hot, sunny days or anytime when you're craving a summery treat!

I love the flavor combo of the berries and mangoes! The mangoes are sweet and the berries have a hint of tartness that just make these pops, pop!

To store, place back in the molds and keep in the freezer.

These pops are healthy, beautiful, easy to make, and delicious! Perfect for a snack by the pool or to cool off after spending time outside in the sun!

Let me know what you think of my Mango and Berry Popsicles! Please share this post with your friends and family!

Follow the blog via email or/and Google, on Twitter @ SpinachisGood and on Pinterest @ Hannah Plunkett .

Stay tuned for more post on all things healthy lifestyle. New post every Monday and Friday!

Keep Healthy and Safe!
H.Banana
 

Mexican Frozen Hot Chocolate

  Happy Cinco De Mayo! This rich, spiced, and cold dessert is the perfect healthy treat to celebrate Cinco de Mayo! Its a perfect blend of chocolate and cinnamon with just a hint of cayenne! No matter when you serve this treat, its sure to be a hit!

Cinco de Mayo is a celebration of the Mexican's victory over the French forces in The Battle of Puebla on May 5 , 1862. This holiday is celebrated in Mexico as well as the United States!


So, lets make this delicious Frozen Hot Chocolate!

Ingredients:
1 cup Dark Chocolate Chips
1 cup Unsweetened Almond Milk
1/2 tsp. Cinnamon
Pinch of Cayenne( less is more!)
1/2 tsp. Vanilla
Pinch of Salt
3 cups Ice

First, add milk, cinnamon, vanilla, cayenne and salt to a sauce pan and whisk. Bring this mixture to a simmer.


Once the milk mixture is simmering, pull it off the heat and add the chocolate chips. Let this sit for 30 sec. to a minute before you try and stir.


Once you have let this set, whisk together until the chocolate has melted and everything is combined.
Pour this into a jug or pitcher and set in the fridge. You want this mixture to go completely cool before we move on to the next step.

Once it has chilled, take it out of the fridge and give it a stir. Put the ice in a blend along with the chocolate sauce. You might need to add a splash of almond milk.

 
Blend until everything is combined and the mixture is nice and smooth!
 
Pour into some glasses and enjoy! This made enough for about 3 to 4 servings.
 
 
This was so delicious! I can't get over how beautiful all the flavors are together! The richness of the chocolate pairs so well with the warmth of the cinnamon and the cayenne adds a nice little kick! My little brother was very happy with his portion! He, my sisters and I enjoyed this for a mid morning treat!

He kept saying 'Thank you', it was so cute!

 
I hope you try this Mexican Frozen Hot Chocolate to celebrate Cinco De Mayo, or anytime! Please share this post with a friend!
 
Follow the blog here , on Twitter @ SpinachisGood and on Pinterest @ Hannah Plunkett.
 
Keep Healthy and Safe!
H. Banana